
Gyprock Installation in Perth: Board, Fixing and Finish Decisions
Gyprock installation in Perth: what the trade name actually covers, how ceiling board thickness and span are chosen, and what to check before painting.
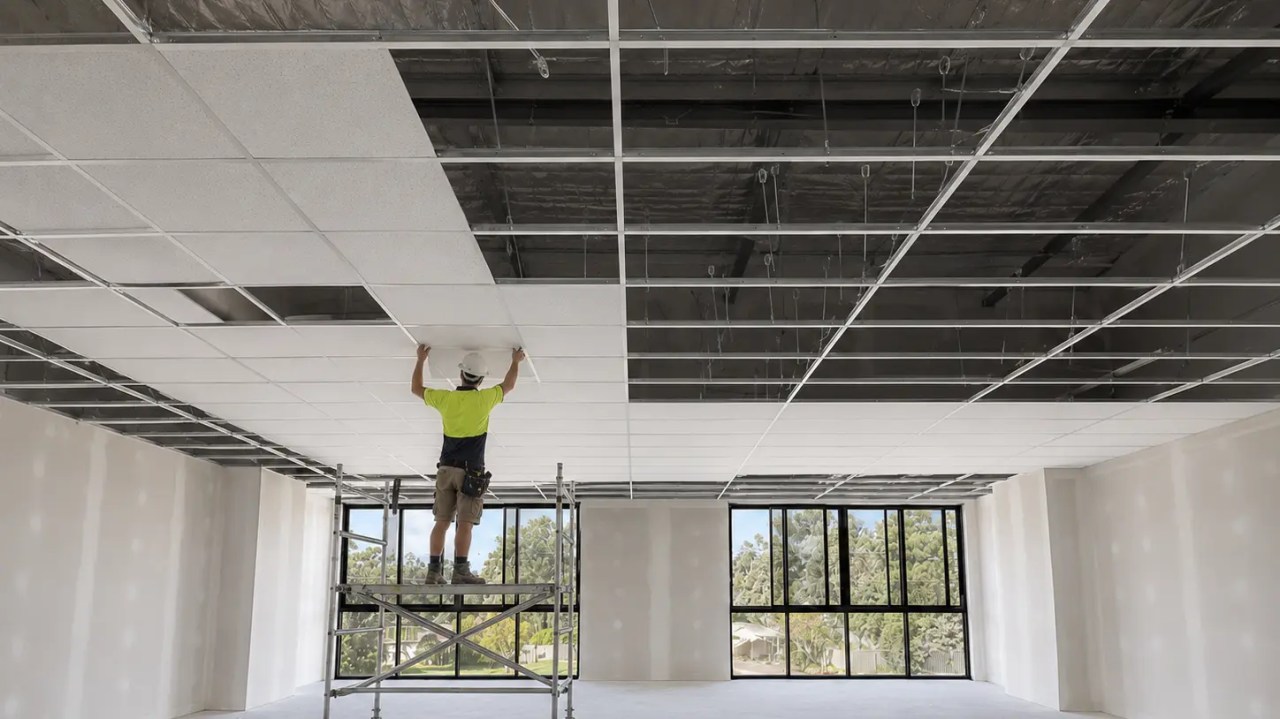
This guide covers what the term covers, what the board is doing in a ceiling, how thickness and framing are chosen together, and what to inspect before the painter arrives.
What Gyprock Means in Australian Trade Use
Gyprock is a CSR brand of plasterboard and associated products, and it has become a generic term for paper-faced plasterboard lining in the same way other brand names have become trade shorthand.
The practical consequence is that a specification should name the product family and the thickness rather than the trade term. A house may require standard board in living areas, a moisture-resistant board in bathrooms and laundries, and a specific board as part of a rated or acoustic assembly, and those are different products within the same supplier’s range. The manufacturer publishes them as separate ranges with published properties, as the moisture-resistant plasterboard range and the acoustic plasterboard range illustrate.
The second consequence is that the word hides a sequence. “Gyprocking” a ceiling involves framing, sheeting, fixing, taping, coating, sanding and preparation, and each stage has a standard the next stage depends on. Where a homeowner is comparing quotes, the useful question is which stages are included and to what finish level, because those are what the price difference usually reflects.
The third consequence is that the term is used across both residential and commercial work. The systems are different in the way they are documented and in their performance requirements, which is why the material requirements behind any of them start from the building framework published by the Australian Building Codes Board and the standards published through Standards Australia.
What the Board Is Being Asked to Do in a Perth Ceiling
A ceiling board is being asked to provide a finish, to carry its own weight over the frame spacing given, and in some rooms to contribute to moisture, fire or acoustic performance.
The finish requirement is the one that decides most of the visible quality. Ceilings are viewed from below, often in glancing light, and the surface has to be flat enough that joints and fixings do not show. That depends on the frame, the fixing pattern and the jointing sequence as much as on the board, which is why a specification that names only the board does not control the outcome.
The structural requirement is about span and support. Board deflects between fixings, and the combination of thickness and frame spacing decides how much. Standard 10 mm board on framing at standard centres is the common residential arrangement; where the spacing is wider, or where a flatter ceiling is wanted, a thicker board is specified. The two numbers belong together, and changing one without the other is where sag between fixings starts.
The performance requirement applies to specific rooms. A bathroom ceiling needs moisture resistance and a sealed, jointed system. A garage ceiling beneath a habitable room, or a ceiling between dwellings, may need to form part of a rated or acoustic assembly. Our wider guide to planning plasterboard installation covers the sequence decisions that apply across walls and ceilings; this page concentrates on the ceiling-specific choices.
Board Thickness and Ceiling Span in Residential Work
Thickness is chosen against the frame spacing and the finish level: a thicker board spans further between supports and produces a flatter field, while a thinner board is lighter to handle overhead and takes a curve more easily.
| Choice | What it improves | What it demands |
|---|---|---|
| 10 mm board at standard frame centres | Light handling; suitable for most residential ceilings | Framing installed to suit the system; careful fixing |
| Thicker board where specified | Flatter field; better resistance to minor impact and deflection | Two-person handling overhead; heavier fixings and support |
| Two layers where a system requires it | Rated or acoustic performance as documented | Fixing pattern for each layer; longer programme |
| Curved or raked ceilings | Adaptability to geometry | Closer framing; the right board for the radius |
For most Perth homes the practical answer is a single layer of standard board in the dry rooms and a specific board where moisture or performance requires it. The exception is where the ceiling will be seen in strong glancing light, or beneath a window with a hard finish and no cornice, because those are the conditions in which a slightly flatter field becomes visible.
Framing Decisions That Decide the Finish
The frame sets the ceiling line, so framing decisions are finish decisions: spacing, straightness, level and the support provided at the perimeter all show through the lining.
Spacing is the first decision and it is made with the board thickness rather than separately. Closer spacing with a thinner board gives a stiffer ceiling with more fixings; wider spacing with thicker board gives a similar result with fewer fixings and heavier sheets. The combination should be the one the system is designed for, particularly where a fire or acoustic assembly applies, because the spacing is part of the tested system.
Straightness is the second. Battens or furring channels that are not set to line produce a ceiling that appears wavy from below, and the effect is most obvious near the perimeter where light falls across the surface. Where a ceiling is being re-lined over existing framing, the framing is checked before sheeting, because defects in the frame are far more expensive to correct afterwards.
The perimeter is the third, and it matters differently depending on the junction detail. Where a cornice is used, the profile covers the corner and absorbs small variation. Where the ceiling is to be finished square set, the perimeter framing has to be set to line and checked before sheeting, because the finish line is the frame line. Where a ceiling has to meet a raked wall or a change of level, the framing also determines how the lining is supported at the change, which is the detail that most often produces cracking in raked ceilings.
Fixing Patterns and Why They Matter at the Joint
Fixings hold the sheets to the frame, and their spacing, depth and position relative to the sheet edge decide whether the ceiling moves as panels or concentrates movement into a crack line.
Spacing follows the system. Fixings are placed at the specified intervals, with the perimeter of each sheet fixed at closer spacing than the field, because the edges are where the joint is set and where movement shows first. Over-driven fixings break the paper face and create a local weakness that appears later as a crack or a popped fixing; under-driven fixings leave a high spot that shows in glancing light. Both are items to check before jointing starts, not after painting.
Joint position is the other half. Longitudinal joints are set out to fall away from the main sightline, and joints are kept clear of the edges of openings and the points where services penetrate, since those are where stresses concentrate. In ceiling work, using the longest sheets that can be handled reduces the number of butt joints, which are the hardest type to conceal and the most dependent on the finishing standard.
Where a ceiling is large, control joints may be required by the system. These are specified in the lining standard and the system documentation, and a ceiling that should have had them but did not will crack where the stress accumulates. The fixing, jointing and coating sequence for the system being used is published in the manufacturer’s installation and decoration guidance.
Wet-Area and Fire-Rated Board in the Same House
A single house routinely needs several board types at once, and where two requirements overlap the more demanding system governs the whole affected area rather than being split between them.
Wet areas are the common case. A bathroom ceiling needs a moisture-resistant board, sealed cut edges where required, water-resistant jointing products and, where tiling follows, a waterproofing system compatible with both. The manufacturer publishes these as combinations for each application, which is why the wet area lining solutions are organised by room type rather than by product.
Rated construction is the second case. Where a ceiling or a wall forms part of a fire-rated or acoustic assembly between a house and a garage, between dwellings or around a shaft, the assembly is documented rather than selected, and every element in it matters: board type, thickness, layer count, framing, fixing pattern and the treatment of each penetration. The published fire-rated wall solutions and system-specific boards such as the fire-resistant plasterboard range show how those assemblies are built.
The practical consequence for a homeowner is that the specification has to be room by room, and that substituting a board later is a change to the system. Where a plasterer is pricing the work, the board list should come from the documentation rather than from a general assumption about what a ceiling uses.
What to Inspect Before the Ceiling Is Painted
Inspect the frame before sheeting, the fixings before jointing, and the finished surface under the room’s own lighting before painting, because painting cannot conceal a defect in any of the three.
Frame inspection covers line, level and the security of every fixing point, and it is the only stage at which the work is easily corrected. Fixing inspection covers depth and spacing, including the closer spacing at sheet edges, and includes checking that the joint positions match the set-out. These two checks take a fraction of the time that correcting them later would.
Before painting, the surface is inspected with a light held almost parallel to the ceiling. That condition reveals flatness, joint ridges and signs that a fixing has been driven too deep, none of which are visible when light falls evenly. It is the same inspection used on any high-finish ceiling, and it is the reason the finish level should be agreed in writing at the start rather than judged at the end. Our guide to what distinguishes a high-quality gyprock ceiling installation covers the same checks from the client’s side.
Two final items belong on the list. Confirm that insulation has been installed correctly around services before the ceiling is closed, since it is effectively sealed in afterwards. And confirm that any penetration cut after sheeting has been treated as the assembly requires, because a hole for a downlight or an exhaust fan made without regard to a rated or acoustic system can undo the performance of the whole ceiling. For scope on ceiling and lining work, see the CeilingPro ceilings service page.

Frequently Asked Questions
How much does it cost to install gyprock?
CeilingPro does not publish prices or price ranges. The scope depends on the area and the number of rooms, access and ceiling height, the board type and thickness specified, whether framing has to be corrected, the finish level, and whether the room is occupied. Those are established by inspecting the space, not by applying a rate to a floor area.
Does gyprock need plastering?
No. Paper-faced plasterboard is finished by taping and coating the joints and covering the fixings, then sanding, rather than by applying a plaster coat over the whole surface. A skim coat or surfacing pass is only added where a higher finish level is specified or where the surface has mixed textures. The two approaches are different trades and different sequences.
How is a gyprock ceiling installed?
The frame is checked to line, sheets are fixed at the specified spacing with the fixings set just below the paper surface, joints are taped and coated in stages, and the surface is sanded and inspected before painting. Ceiling work overhead requires two people and safe access, and rated or wet area assemblies have to follow their system documentation rather than a generic method.
Can you use 10mm gyprock for ceilings?
Yes, 10 mm board is commonly used on residential ceilings where the framing spacing and the system allow it, and it is easier to handle overhead than a thicker sheet. A thicker board is specified where a flatter field is wanted over a wider span, where the system requires it for performance, or where impact resistance matters. The framing spacing and the board thickness belong together.
If you are specifying plasterboard or gyprock for a Perth ceiling and want the board, frame and finish decisions tied to the rooms involved, use the CeilingPro enquiry form and select ceilings, or email info@ceilingpro.com.au.
Related articles
 Ceiling Replacement in Perth: Scope, Sequence and What Changes Mid-JobKnowledge
 Cornice Installation in Perth: What a Cornice Installer Surveys Before QuotingKnowledge
 Ceiling Skirting and Architrave: Matching the Junction DetailsKnowledge
 Wall and Roof Cornice: Where the Ceiling Line Meets the Facade and EavesKnowledge