
Plasterboard Installation: Board, Framing and Fixing Decisions
Plasterboard installation is decided before the first sheet goes up: board type, framing line, fixing pattern, joint position and the finish you accept.
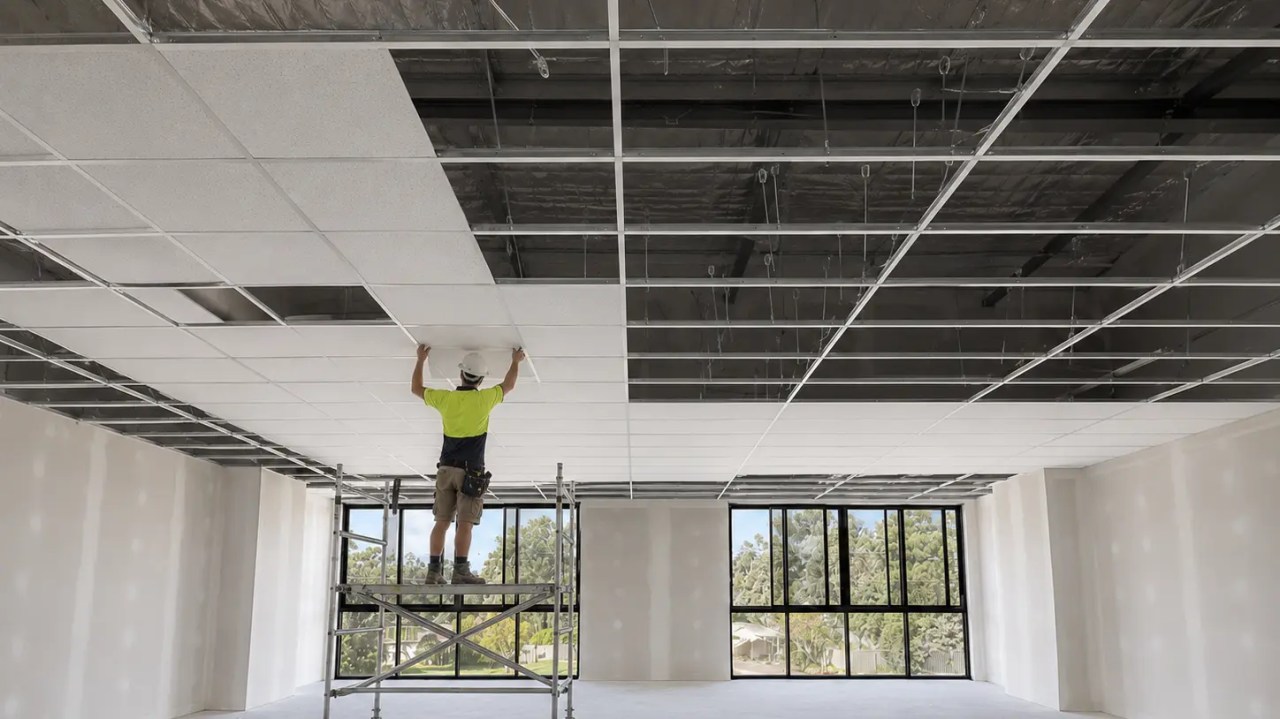
This guide covers what the board is being asked to do in each location, how framing and fixing affect the finish, and what to inspect before the painter arrives.
What the Board Is Being Asked to Do
Every sheet on a project is performing at least one job beyond covering the frame: providing a finish, resisting moisture, contributing to a fire-rated or acoustic assembly, or carrying a surface that will be washed and knocked in daily use.
Where the board is purely a lining, the requirement is a flat, straight surface with joints that can be hidden and an edge that will not show through paint. Where the board sits in a wet area, the requirement changes to a moisture-resistant core, sealed cut edges and a jointing product designed for that environment. Where the board forms part of a fire-rated or acoustic system, the requirement is no longer a product choice at all: the assembly has been tested with specific board types, thicknesses, fixing patterns and joint treatments, and substituting any of them invalidates the system.
Those requirements are cumulative. A ceiling over a shower in a fire-separated apartment has to satisfy all three at once, and the resolution is usually a specific board with the appropriate rating rather than a compromise between two products. Working out which requirements apply, and where, is the first task on any project, and it is the reason a lining specification starts with the room schedule rather than the product list.
The nationally applied requirements behind these choices live in the National Construction Code, with lining installation standards published through Standards Australia.
Board Types and Thickness by Application
Board type follows the exposure, and thickness follows the span, the finish level and whether the sheet has to contribute to a rated assembly; in residential ceilings 10 mm is common and 13 mm appears where a flatter field or a specific system demands it.
Standard board suits dry interior linings. Moisture-resistant board is used in bathrooms, laundries and behind tiled surfaces where a wet area system applies. Fire-resistant board is specified as part of a tested assembly and is not interchangeable with standard board even where the thickness matches. Acoustic board adds mass and is specified where an assembly’s acoustic performance depends on it.
| Location | What drives the choice | What else must change |
|---|---|---|
| Dry living areas and bedrooms | Finish quality over a long span | Frame line, joint positions, finish level |
| Bathrooms, laundries, behind tiles | Moisture exposure and sealing | Waterproofing system, sealed edges, wet area jointing products |
| Party walls, intertenancy ceilings | Rated or acoustic assembly performance | Board type and layers, fixing pattern, penetration treatment |
| Shafts, lift and service risers | Rated construction with limited access | System-specific board, lining sequence, access provision |
Framing, Furring and the Effect on the Finish
Framing decides the ceiling line, and the ceiling line decides the finish; a frame that is out of level or out of line cannot be corrected by a board or a jointing product, only by reworking the frame before sheeting.
Residential ceilings are typically fixed to timber battens or to a steel ceiling system, and both have to be installed to line. Furring below an existing structure, or below services, introduces additional spacing that has to be consistent, because variation in batten depth becomes variation in the ceiling plane. Where a ceiling has to clear ducting or pipework, the depth of the drop should be set by the deepest service plus the required clearance, not resolved fitting-by-fitting on site.
Frame spacing also matters for the finish. Wider spacing with thicker board produces a stiffer ceiling with fewer fixings, while closer spacing with thinner board is cheaper in material and slower in labour. The combination should be the one the system is tested and specified for, particularly where a fire or acoustic rating applies, because the spacing is part of the assembly rather than a site preference.
Where a ceiling meets a wall, the perimeter frame has to be true because the junction detail is fixed to it. A cornice can absorb small variations, and a shadow line cannot. That difference is the reason the junction detail should be confirmed before the frame is closed in, and our Perth fit-out work at Southern River WA is an example of a commercial ceiling where the perimeter, the grid and the services above it were set out together.
Fixing Pattern and Joint Position
Fixings hold the board to the frame, and their spacing and depth decide whether the lining moves as a panel or concentrates movement into the joint; joint position then decides how much of that movement a room will show.
Fixings are driven at the spacing the system specifies, held at the correct depth so the head sits just below the paper without tearing it, and kept back from the sheet edge by the margin the system requires. Over-driven fixings break the paper face and create a local weakness that appears as a crack line after the first heating cycle; under-driven fixings leave a high spot that shows in glancing light. Both are inspection items, not cosmetic ones.
Joint positions are set out so that longitudinal joints fall away from the line of sight, and so that joints do not line up with the edges of openings, which is where movement concentrates. In ceiling work the shortest practical sheet reduces butt joints, because a butt joint is harder to conceal than a tapered joint and depends more heavily on the finishing standard.
Where the ceiling is being sheeted over a large area, expansion and control joints may be needed. These are specified in the lining standard and in the system documentation rather than invented on site, and a ceiling without them in the wrong situation will crack along the line where the stress accumulates. The fixing and finishing requirements for the system being used are published in the manufacturer’s installation and decoration guidance.
Wet-Area and Fire-Rated Board in the Same Build
Where a wet area and a rated assembly meet, both requirements apply to the same linings, and the resolution is a board and a system that satisfies the more demanding of the two across the whole affected area rather than a patchwork.
The wet area side depends on the substrate and the waterproofing system. Board selection, sealed cut edges, the jointing product and the waterproofing all work as a set, which is why the published wet area lining solutions are organised by application rather than by product. Where tiling follows, the waterproofing interface and the board have to be compatible, and any change to the board after the waterproofing specification is a change to the system.
The fire side is documented as a system rather than a product: board type, number of layers, thickness, fixing pattern and penetration details. The fire-rated wall solutions published by the manufacturer show how the systems are assembled, and system-specific boards such as those in the fire-resistant plasterboard range or the shaft lining range are supplied for that purpose.
The practical consequence for a builder is that the sheeting package should be priced and scheduled from the system documentation, not from a generic square-metre rate. A rated ceiling over a wet area can require two layers on one side and a specific joint treatment, and that changes both material and programme.
Set Versus Square Set Finishing
Set finishing leaves a cornice at the wall-to-ceiling junction, and square set finishing removes the cornice and forms the junction in the lining; the second option transfers attention from the profile to the frame, the joint and the finish level.
With a cornice, the junction is a product detail and small tolerances are absorbed by the profile. With square set, the junction is a lining detail and every tolerance is visible, so the frame has to be set to line and the joint has to be taped and coated to a standard that survives glancing light. Square set also changes the acceptable finish level on the whole ceiling, because the junction is the most obvious place for a defect.
The choice is usually made for design reasons and then funded from the framing and finishing budget rather than from the product budget. Where a project is trying to reduce cost at the end of a build, square set is the wrong detail to reach for, because the labour and the risk both increase.
Where a cornice is being used, the profile and the board thickness should still be checked together, since a heavy profile over a light board fixed at wide spacing is a combination that moves more at the perimeter than either product suggests on its own.
What to Inspect Before a Plasterboard Installation Is Painted
Inspect the frame before sheeting, the fixings before jointing, and the finished surface under the lighting the room will use; those three checks catch the defects that painting cannot hide.
Before sheeting, check the frame for line, level and the security of every fixing point. After sheeting, walk the surface and look for over-driven and under-driven fixings, then check that joints were taped rather than filled. Before painting, inspect the surface with a light held almost parallel to the ceiling: this is the only condition in which the true flatness shows, and it is the same standard applied to any high-finish ceiling such as the work described in our level 5 finish guide.
Two other items belong on the list. Confirm that the ceiling void is clear of debris and that insulation has been installed and fitted correctly around services, because both are effectively sealed in once the ceiling is closed. And confirm that any penetrations cut after sheeting have been treated as the assembly requires, since a hole for a downlight or a vent made without regard to a rated or acoustic system can undo the performance of the whole ceiling.

Frequently Asked Questions
What is the Australian standard for plasterboard installation?
Plasterboard lining installation in Australia is governed by the gypsum lining standard published by Standards Australia, with the building requirements it supports set out in the National Construction Code. The standard covers the lining materials, the framing and fixing, and the jointing and finishing levels a project can specify. Standards Australia publishes the title and scope of the standard, and any project specification should name the current edition.
What is the best way to install plasterboard?
There is no single best sequence, but the reliable ones share three things: a frame checked to line before sheeting starts, sheets sized so joints land away from the busiest sightlines, and a fixing pattern that lets the jointing tape work instead of concentrating movement. Getting the frame right is worth more than any choice of compound or technique later.
How do I install gyprock plasterboard?
Gyprock plasterboard is installed like any other gypsum lining: sheets fixed to a frame set to line, with fixings driven at the correct spacing and depth, joints taped and coated in stages, and the surface sanded before decoration. Ceiling sheeting is heavy overhead work that needs two people and safe access, and rated assemblies must follow the tested system rather than a generic method.
Is plasterboard easy to install yourself?
Small patch repairs on a wall are within reach for a confident owner. Full ceiling sheeting is not, because overhead sheets need two people, working at height, and a frame that was checked before sheeting started. Rated assemblies, wet areas and any work above a ceiling containing services should be done by licensed trades, and electrical work must be carried out by a licensed electrician.
If you are specifying or pricing plasterboard installation for a Perth project and want the board, frame and finish decisions checked against the space, send the room schedule and drawings through the CeilingPro enquiry form, or email info@ceilingpro.com.au.
Related articles
 Shadow Line Ceilings and Shadowline Cornice: The Detail Behind the GapKnowledgeDecorative Plasterboard and Plasterboard Cornice: When a Feature Ceiling Needs More Than BoardKnowledgeCornice Moulding and Ceiling Moulding: The Same Job, Three Different TradesKnowledge
 Cornice Sizes and Lengths: Matching a 90mm Cornice to the Ceiling HeightKnowledge